


Part 2: Introduction to VanLife Electricity
How much power do you need?
Before we can get into all the different components you’ll use in your van, we’ve got to start at the beginning. The first step to designing your van’s electrical system is to plan how much power (in amp/hours) you’ll use for your daily electrical needs. This is called your daily consumption. Knowing how much power you’ll need each day is an essential step to making sure you get the right size battery and solar panels for your build. A person who only needs a power system to run a fan and lights will have a very different-looking power system than someone who’s also running a tea kettle, induction plate, TV, and an air conditioner.
It will take some time to calculate your daily electrical consumption, but you’ll only need to do it once to make sure you have the right size of electrical system — that is to say, big enough batteries and solar panels to power what you’ll need. Once you’ve listed out each and every load you’ll use and the power they’ll need, you be able to estimate how large (or little) your electrical system will be so you can buy the correctly-sized batteries and solar panels.
Calculating your daily electrical consumption is easy. To start, make a list of every single load you plan to have in your van. That list might look something like this: lights, fridge, fan, phone chargers, computer chargers, and an induction plate. Make sure to include everything you’ll plan to use!
Next, you’ll need to look at the instruction manual for each of your loads to figure our how many amps each load uses. Stores like Amazon are great for this — you can usually find the specific electrical information for a load in the product’s fine print. Once you know how many amps a load uses, multiply the load’s amperage and by how many hours you plan to use it each day. For example, our induction plate uses 15 amps to run. We’ll plan to use it 1 hour a day at 80% of its maximum heat, so it will use 15 amps * 0.8 * 1 = 12 amp/hours (Ah) a day. One of our bigger loads for sure!
Once you’ve calculated the Ah for each load in your van, add them all up to get your daily power consumption. If we’re using a blender and an induction plate every day (not very likely), we’ll be using about 42 amp/hours of power a day. That’s quite a bit, but we can cut it by more than half taking those two appliances our of our daily routine. For most days on the road, we’ll plan to use about 30 amp/hours of power a day.
 We created a free Daily Power Consumption Calculator that you can use to figure out how much power you’ll use each day. We even created a few examples in it to make it easier. Total up how many amp/hours you’ll use a day, and then we can move on to sizing your electrical system! Yay for figuring out what size of batteries and solar panels you’ll need!
What battery is best for Van Life?
In our example above, we learned that we’ll use 30 amp/hours of energy a day. The next step is to choose a battery size that fits your electricity needs. It’s important to note that you’ll want to be able to go a few days without having to charge your batteries (in case it’s not sunny or you’re not driving), so you’ll want your battery system to accommodate that. We advocate for getting a battery that is 2-4 times larger than your daily consumption. Going bigger is more expensive, but it buys you convenience and peace of mind.
There are a number of different battery types on the market, but when it comes down to it, we recommend either AGM or Lithium-Ion batteries. Flooded-lead acid and gel-cell batteries are sometimes used in RVs and other off-grid systems, but they’re not ideal for van life (with the necessary maintenance and venting). AGM and Lithium-Ion batteries also don’t have to be vented and don’t have an electrolyte that can spill and catch fire. That’s a nice, big plus.
AGM Batteries
AGM batteries are a great choice because they’re very hands-off: their maintenance level is almost non-existent (no need to vent or fill with water), they’re relatively cheap, and they do a good job of powering your loads even in colder weather. The two cons here are that they’re heavy (our 155Ah battery weighs 90 lbs), and you can only discharge them to 50%. That means that we can only use 77.5 Ah of our 155 Ah battery! You essentially have to buy two of them for their power rating.
In our example, we use 30 Ah of energy a day. We multiplied that by 3 so we could go 3 days without charging, so now we looking at a 90 Ah battery. But since you can only discharge 50% of an AGM battery, that means we need a 180 Ah battery.
Lithium-Ion Batteries
Lithium-Ion batteries are a good choice if you’ve got the money for them and don’t plan on driving in the cold. Technology-wise, it’s the same type of battery that’s used in most phones and computers. They’re as low maintenance as AGM, they can be discharged deeper than AGM, but they’re more expensive and can’t be charged when it’s below freezing. Technology and pricing for lithium-ion batteries has gotten better and better, and we’ve heard a lot of people raving about how great their lithium-ion batteries are.
Our Recommendation
 In the end, we decided to go with two 155 Ah AGM batteries (we went with Vmaxtanks’ 155ah Deep Cycle). We balked at the price of Lithium-Ion, and since we’re planning to ski throughout the winter, we didn’t want to have to worry about the cold temperature affecting our batteries. (Note: we know winter VanLifers that use lithium ion batteries no problem, so this might be a non-issue). Because we can only discharge AGM batteries to 50%, that means we have 155Ah of stored power and plan to use 30 Ah a day, so theoretically our batteries will power our needs for five days (in an ideal world).
Here are a few battery brands we recommend and have heard good things about in the van life community:
– Vmaxtanks
– Renogy
– BattleBorn
– Rolls
– Lifeline
– Dragonfly
Battery technology is getting much more efficient and cheaper lately, so we don’t mind upgrading our system in 3-5 years when there are better products on the market. Keep in mind that batteries are typically the most expensive component in your electrical system if you’re building a larger system.
Our 155 Ah AGM batteries have served us well for 1.5 years, but we’re probably going to get an even larger system when we replace them. It’s so, so convenient not to need to worry about your power needs on the road, trust us, so get a bigger system than you think.
A few safety notes about batteries
For safety, use identical batteries in your power system – don’t try to combine AGM and Lithium, or different brands, or different capacities, or even different ages of batteries. When you connect your batteries, you can wire them in parallel (keeps the voltage the same and doubles the capacity [Ah]) or in series (doubles the voltage but keeps the same capacity). We wired our two 12V, 155Ah in parallel so that we double our capacity. You can read more about wiring in Series and Parallel over at Renogy.
Use Bus Bars
 You’ll also want to buy a positive and a negative bus bar when you wire your electrical system together. It can be dangerous to try to connect a whole bunch of wires to two studs on your battery — it’s a lot of wires for two studs. A bus bar is essentially an extension of your battery’s stud — but it has six studs so that you can make plenty of connections. Essentially, it allows you to attach all of your wires to a bunch of studs instead of trying to fit them all on the battery stud. To install a bus bar, connect a negative bus bar to the negative end of your battery terminal (and the same for your positive terminal), then run connect your load wires off the bus bars instead of the battery terminals. Then, you can buy a rubber cover to place over your bus bar. Safe and clean. We opted for a Blue Sea Systems 250A 6 Stud Bus Bar.
Use an On/Off Switch
 Finally, it’s also a good idea to wire a master on/off switch between your batteries and everything else. We placed ours on the wire between the positive terminal of our batteries and our positive bus bar. If you need to check your wiring or if there’s ever a fire, you’ll need a way to completely disconnect everything from power at the flip of a switch. We opted for the Blue Sea Systems 350 Amp E-Series Battery Switch.
Now that you’ve found the right sized battery bank for your van, we’ve got to decide on how we’re going to power it.
3 Ways to Charge Your VanLife Batteries: Solar, Shore Power, B2B Charger
Solar
For most van lifers, solar power is the way to go for powering your battery bank. Nothing looks quite as badass as solar panels mounted to the top of your adventure-mobile, and you get those warm-fuzzy feelings of powering your electronics with carbon-free electricity. Yew!
How many solar panels do I need?
 How many panels do you need? Usually, a 100W solar panel can charge 25 Ah a day in ideal, perfect conditions (which you won’t have). We went with 320W of solar on our roof, but we were hoping to fit a 540W array (but it was a bit too big with our ceiling fan). In a perfect day, we should bring in 80 Ah of power a day and consume only 30 Ah; since conditions are never ideal, we decided to “over-build” our solar so we didn’t have to worry about it. So far, our panels keep up with our needs super well!
Flexible or Rigid Solar Panels?
Flexible solar panels have a lot going for them: they’re super thin because they don’t have a frame, they’re lightweight, and they can be attached to your van roof with adhesive instead of screws. However, they do have a shorter lifespan, and we worry about how secure they are on a van roof, exposed to the elements and exposed to highway speeds. Rigid panels are the more tried-and-true type of solar panel — they’re thicker, heavier, and need to be screwed to your van roof, but once they’re installed, they’re not going anywhere. Plus, their average lifespan is 25 years, so you shouldn’t need to touch them again.
We decided to get rigid solar panels because we were skeptical of adhesive keeping our panels on the roof while driving on highways over a long period of time. They’re more time-consuming to mount. Most rigid solar panels come with brackets that you can screw into your van’s roof. We didn’t want to put screws in our roof (more holes in the roof means more places for leaks), so we opted to attach our solar panels to custom-cut angle iron (that we bought from a local metal yard), which we then attached to our roof rack. It was a lot more work (and probably overkill), but now we have a super-secure solar panel array and didn’t put a single screw through the roof. This custom design also sits lower to the roof than the included brackets. Rad!
Monocrystalline or PV Solar Panels?
You’re ok going with either. Monocrystalline have a high efficiency rate, are space efficient, and have a great lifespan. Polycrystalline panels are less expensive. Just don’t get an amorphous panel — they’re big, inefficient, and expensive.
Series or Parallel?
Just like wiring batteries, you have the choice of wiring your solar panels in series (double the voltage) or in parallel (double the capacity). If you use an MPPT charge controller between your solar panels and your batteries (more on that below!), we recommend wiring in series. It lets you use a smaller wire to your solar panels and can make your array more efficient (it can charge your batteries on cloudier days). If you decide to get a PWM solar charge controller, then you’ve got to keep your solar voltage the same as your battery voltage – 12V – so parallel is the way to go for that. We recommend spending the extra money to get an MPPT charge controller and wiring your panels in series.
Other Solar Considerations
It’s very important to get a good brand of solar panels these days. Renogy is the popular options for vanlifers (we’re happy with ours!). They also have bypass diodes, which can help mitigate the effects of partial shading on your panels. That means they work better if a tree limb is blocking out part of your panel, which frankly is something you never want to worry about.
We’ve seen some folks build a way to manually tilt their solar panels to get better sunlight. That can make a big difference in the winter when the sunshine is low or when you’re out boondocking. You can even get fancy and use a motor to tilt the solar panels or create a manual way to tilt them yourself. We didn’t decide this was important to us, but this would be a really-cool project to do.
Finally, you might consider using a portable solar panel to supplement the array on your roof. They’re easy and cheap to add to your build, and it’s a great way to draw in more sunlight when you’re boondocking. A number of solar panel manufacturers create suitcase-like panels that you can store in your van when you’re not using them — but it won’t be a good option if you’re planning to stealth camp. We’ve considered getting one for winter boondocking, but we haven’t committed to it yet.
Our Solar Panel Choice
 We decided to buy two Renogy 160W Solar Panels and wire them in series to be 24V. This increases their efficiency, and our MPPT charge controller changes the 24V to 12V for our batteries. Renogy is a reputable and popular brand that we felt comfortable using for a long time, and they also have a plethora of resources and guides that we found helpful during our research. Pair that with their customer service, and they seemed like a great match.
We originally wanted to purchase two of Renogy’s 270W panels to have a 540W solar system on the roof, but opted to have a smaller and more stealthy array instead. That’s what we tell ourselves, anyway, since the 540 watt panels wouldn’t fit on our roof after we installed our roof fan. So far, 320W has worked well for us, but going bigger always buys more peace of mind.
Shore Power and B2B Charger
Having another way to charge your batteries other than solar power can really come in handy when it’s wintertime or it’s cloudy out. The sun isn’t going to shine bright every day on your coveted solar panels, so we’ve got two other recommendations for charging your batteries.
Shore Power
You can use shore power by plugging an inverter-charger into a standard electricity socket from your friend’s garage or a campground. Our 2000W Inverter that powers our 120V devices actually has a charger built into it, so all we have to do is add a wire to our inverter so that we can plug into shore power to charge our batteries. Score! I love a device that has multiple uses. We’re glad we added this to our build because it was super simple, but we (luckily) haven’t needed to use it yet.
B2B Charger
You can also use a Battery-to-Battery (B2B) charger to power your house batteries while you drive (just like how your van battery gets charged). You can use an ACR relay instead of a B2B charger to save money, but it’ll shorten the lifespan of your batteries. That’s because an ACR relay doesn’t charge your batteries at an ideal voltage for your batteries; it’s not dangerous, but you’ll probably pay more for it in the long run.
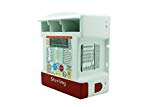
We went with a Sterling BB1260 B2B Charger, and it’s great. It’s hands-off — it automatically charges our house batteries whenever we drive and delivers a healthy level of power specific to our AGM batteries. If you’re looking to save some cash in the short-term, the ACR Relay is a great alternative. We would definitely recommend getting one of these for your build.
Components Galore: Everything You’ll Need to Power Your Van
We’ve already talked about a handful of components for your van’s electrical system: a battery bank, solar panels, and an optional B2B charger to power your batteries while you drive. But there are a few other essential components to your electrical system you’ll need.
Charge Controller
A charge controller is an essential component if you use solar panels. It’s wired between your solar panels and your battery bank. Its job is to take the energy from the solar panels (which is changing instantaneously due to slight variations in available sunlight) and make the voltage ‘play nice’ to charge your batteries well. If you have solar panels, you need a charge controller.
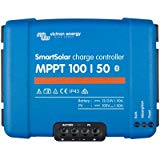 There are different sizes of charge controllers (in both voltage and amps), so you’ll have to look at the specs of different models to see how much solar it can handle. Our Victron 100|50 charge controller can handle 50A and 700W of nominal solar panel power, which is great if we want to add an extra panel later on. Their 100|30 handles 30A and 440W of nominal solar panel power, and their 100|20 handles 20A and 290W. Always, always read the instructions to make sure you get a charge controller that’s big enough for your solar panels. When in doubt – call their customer service! I think Victron and Sterling almost knew me by name the month I designed our system.
Important side note: When you’re wiring your panels, charge controller, and your batteries, be sure to always connect the charge controller to the battery before you connect the solar panels. As soon as the solar panels are hooked up to the charge controller, the charge controller needs to send that energy somewhere. So when you’re connecting the three components, connect the solar panels last. When you’re disconnecting them, disconnect the solar panels first.
MPPT or PWM Charge Controller?
There are two types of charge controllers: MPPT and PWM. MPPT are more efficient when it’s colder and less sunny. MPPT even lets you wire your solar panels in series to suck more energy from the available sunlight and still charge your 12V batteries at a correct voltage. The con is that they’re more expensive than PWM charge controllers.
In the end, we went with a Victron MPPT 100/50 Solar Charge Controller, and we love it. We’re big advocates for ‘buy it nice or buy it twice’ for your electrical system if you can afford it — it’s cheaper financially in the long-term, and you won’t have to re-learn and re-wire later on if you decide to upgrade.
Battery Monitor
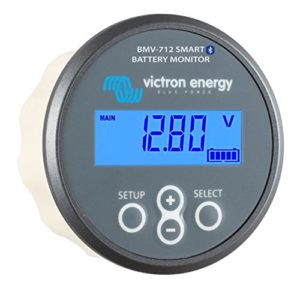 A battery monitor is optional, but it lets you know a lot of information about your power system – what percentage of battery is left, the voltage, how many amps are going in/out of your batteries, and so much more. Plus, a few of the models come with bluetooth so you can monitor your batteries from your phone. While a battery monitor isn’t essential, it is really helpful for making sure you’re keeping good care of your batteries and to eliminate unexpected power outages.
We went with the Victron BMV-712 battery monitor because Victron is amazing and we like the bluetooth capability. Since it’s the same brand as our charge controller (which also has bluetooth), we can keep an eye on our entire electrical system from one intuitive app. Super convenient! But honestly, we don’t use the bluetooth that much — we just check the wall where we mounted our battery monitor.
Inverter
If you want to have standard, 120V household electrical sockets in your van, you need an inverter to step-up the voltage from your 12V batteries to 120V for the outlet. You’ll also need to make sure to find the right size of inverter to power your needs. If you want to use an 1800 watt induction plate in your van, you’ll need an inverter that can deliver at least that much power. The trick is to look up the amount of watts your most demanding appliance will need, then purchase an inverter above that wattage.
We recommend buying a pure sine wave inverter instead of a modified inverter. Without getting into the weeds about it, pure sine wave inverters are more expensive, but they offer a very “clean” type of power that’ll keep your loads healthy. If you cheap out and get a cheap modified inverter, you might notice your electronics start to fritz. Not good if you’re using it to charge a computer!
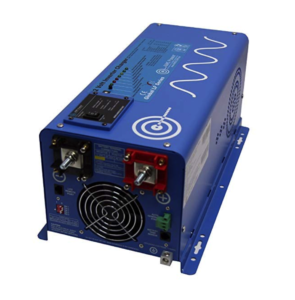
If you buy an inverter charger, your inverter doubles as a way to charge your batteries via shore power. Inverter chargers have an AC In and an AC Out, which means a) it delivers power from your 12V batteries to a 120V socket, and b) can plug into shore power to deliver power from an external power source to charge your 12V batteries. They’re well worth it, in our opinion, because they let you charge your battery system at an RV campground or a friend’s electrical socket.
We decided to buy an AIMS Power 2000 Watt 12V Inverter Charger, and so far we’re very happy with it. We’ve also heard great things about the Samlex pure sine wave inverters a well as Victron.
Fuse Block
 While it’s not technically a component, your fuse block is essentially the breaker box for your van’s 12V DC system – but it uses fuses instead of breakers. Each and every load you have — your lights, fridge, and fan — will have its own set of wires running to and from it, which will also have its own fuse. A fuse block keeps all your fuses in a safe, easy-to-organize box for easy tinkering. Blowing a fuse is inevitable, and you’ll be happy to have a fuse block readily available to replace the fuse when it happens. We’re happy with our Blue Sea Systems ST Blade ATO/ATC Fuse Block.


